Since Spring Roo 2.0.0.M1 version, you are able to increase the power of your Spring Roo installation including advanced features.
The way to do it is using new Spring Roo concept called "Spring Roo Add-On Suites". As you could read on Spring Roo reference guide:
A “Roo Addon Suite” is a great way to package and distribute a set of add-ons together, for example if you want to create advanced features that are not included in Spring Roo Shell by default.
In this post I'm only going to show you how to include an external "Roo Add-On Suite" in your Spring Roo installation to extend Roo shell with advanced functionalities. In a future post, I will publish a tutorial about "How to create your own Roo Add-On Suite" and how to install it.
Where can I found public Roo Add-On Suites?
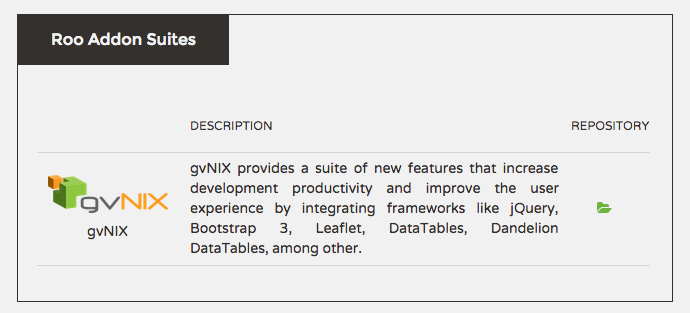
Since Spring Roo 2.0.0.M1 version, Spring Roo has its own Marketplace where public Roo Add-On Suites will be published. Right now, only gvNIX Roo Add-On Suite is available to install it, but I hope that you could publish your own Roo Add-On Suite really soon ;)
Steps to include Roo Add-On Suite
The process to include a "Roo Add-On Suite" on your Spring Roo distribution is really really easy. First of all, let's open Spring Roo 2.0.0.M1 shell:

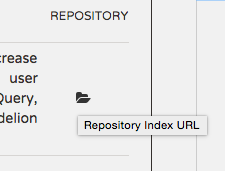
Now, you need to install the URL of the repository that contains the Roo Addon Suite, in this case gvNIX Roo Add-On Suite. To do that, you need to open Spring Roo Marketplace and copy the "Repository Index URL" that you want to install:
When you have copied the repository index URL, you need to execute the following command on your Spring Roo Shell to install the repository:
roo> addon repository add --url http://repository.gvnix.org/index.xml

To know how many Roo Addon Suites contains the repository, you need to run the command below:
roo> addon suite list --repository http://repository.gvnix.org/index.xml

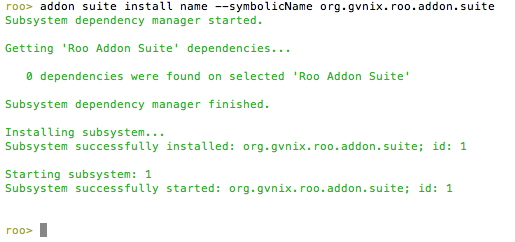
Let's install the gvNIX Roo Addon Suite that contains advanced features like jQuery, Bootstrap 3, Leaflet, DataTables, Dandelion DataTables, etc... To do that, execute the following command:
roo> addon suite install name --symbolicName org.gvnix.roo.addon.suite
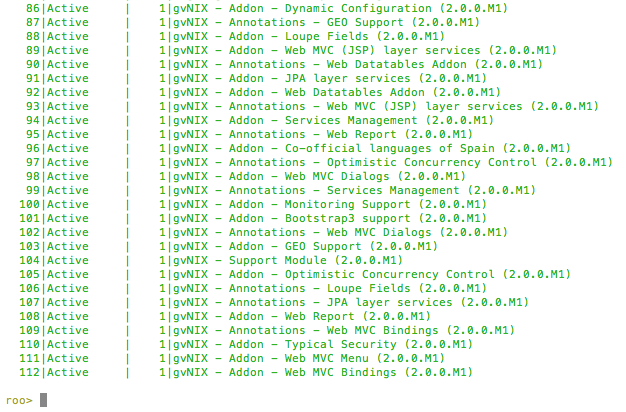
To validate that all the advanced features included on gvNIX Roo Add-On Suite were included on your Spring Roo installation, you could execute the following command:
roo> addon list
Congratulations!!! You have increased the power of your Spring Roo installation!!!!
Testing advanced functionalities
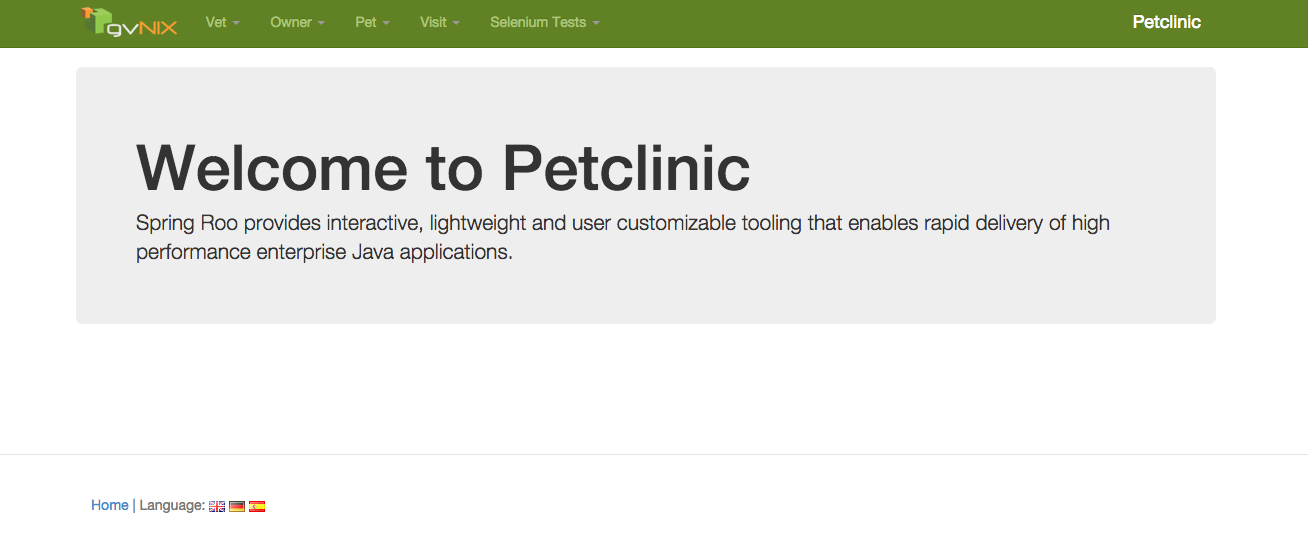
Now, you are going to generate a basic petclinic application with bootstrap appearance... remember that this is possible thanks to gvNIX Roo Add-On Suite!
1. Open Spring Roo 2.0.0.M1 Shell on an empty directory
2. Execute script clinic.roo to generate basic petclinic application
3. Execute web mvc jquery setup command provided by gvNIX Roo Add-On Suite to install jQuery in your project.
4. Execute web mvc bootstrap setup command provided by gvNIX Roo Add-On Suite to install and use Bootstrap layout.
5. Execute exit command to quit Spring Roo Shell
6. Run your generated project on Tomcat server. You could use maven command mvn clean compile tomcat:run.
If you follow the steps above, you will have a basic petclinic application with Bootstrap appearance on http://localhost:8080/petclinic:
Enjoy with Roo!
Juan Carlos García